Invisible Terrace Fixing Instructions
Installation Instructions For Invisible Terrace Fixing Clips
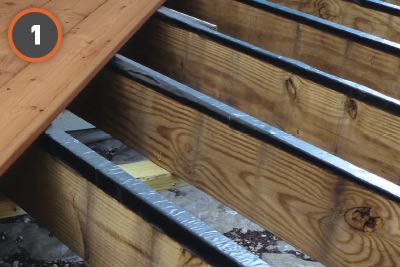
Step 1: First Terrace Plank Installation
Apply Bituminous strip or tape (if available) or a bead of exterior adhesive to your sleeper joists roughly 9,5mm in width. If working with adhesives, you should consider applying this as you go. This will help prevent the adhesive from drying too quickly. It is important to note that adhesive does increase hold-down strength, but will not stop timber rot. Bituminous strips or tape helps stop joist timber rot and also acts as a seal around fixing screws. Although joists may appear level, fluctuations in weather can trigger plank movement. Bituminous strips or tape and/or adhesive will additionally aid the prevention of squeaking from unlevel joists.
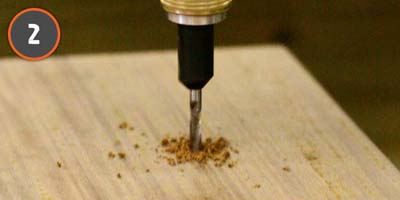
Step 2: Drilling a 3,2mm Pilot Hole
Utilize a 3,2mm drill bit to pre-drill screw pilot holes for securing the starter plank. Drill holes every 61CM along the ledger plank. Make sure to drill deep enough to penetrate the plank but not the ledger underneath. All Invisible Terrace Clip Kits include a 3,2mm High Speed Drill Bit. We suggest using the 3-in-1 Drill & Drive™ Drill Bit Set (not included in Kits), which has a 3,2mm drill bit, 9,5mm countersink bit, and screw gun T15 Star tip that will assist in speeding up this procedure.
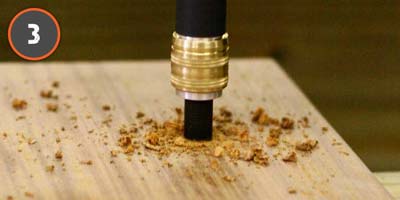
Step 3: Drill a 9,5mm Countersink Hole
Utilize a 9,5mm countersink bit to drill a hole roughly 6,4mm to 9,5mm deep (dependent on your plank thickness) for every screw to be concealed by a hardwood plug. Be certain your countersink bit is sharp and cuts a clean edge.
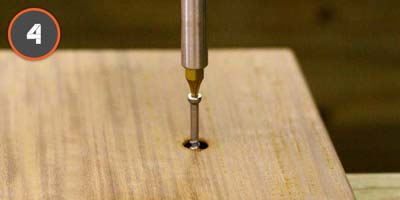
Step 4: Drive a Terrace Screw Through the Countersunk Hole
Next, firmly drive a terrace screw into countersunk hole and into the sleeper joist beneath. All EXTREME® Clip Kits contain extra screws for starter planks. (Hardwood Plugs will next be fitted into the countersunk holes to hide the screws and create a family safe surface, free of dangerous screw heads.)
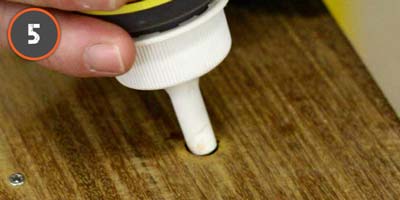
Step 5: Apply Glue Inside Countersunk Hole
Drop a small dab of timber glue (Gorilla Glue® is recommended) inside of the countersunk screw hole drilled in the previous step. This will guarantee the timber plug will not back out in the future. Additionally, the glue will function as a moisture barrier, plugging the countersunk screw hole. NOTE: After 1-2 hours glue will be 80% cured and after 24 hours 100% cured for best results.
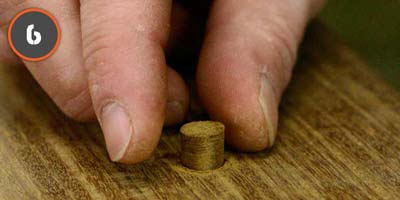
Step 6: Place a Hardwood Plug Inside Countersunk Hole
Insert a 9,5mm tapered Hardwood Plug and knock it down using a hammer so it fits tight within the hole. Be sure to wipe away and remove any excess glue that may be forced out. NOTE: To conceal the plug as much as possible, we recommend aligning the timber fiber grain of the plug with the plank fiber grain.
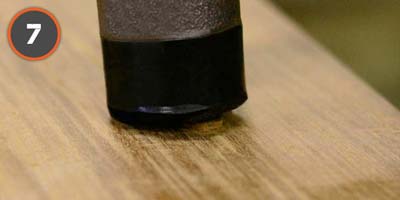
Step 7: Hammer and Flush Cut the Plug
After the plug is hammered in place and the glue has dried, cut off any excess timber material above the plank surface. You may achieve this by utilizing a flush cut pull saw, belt sander or an orbital sander with 80 or 120 grit sandpaper.
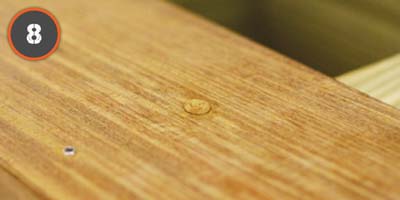
Step 8: Sand and Prepare for Hardwood Oil Finish
Sand smooth all areas where a plug was installed to be sure it is flush with the plank surface. An orbital sander with 120 grit sandpaper works best. When sanding is completed, we encourage using a natural wood oil finish for a striking natural wood color over the entire terrace. A water based Oil Finish with a slight tint of brown color will bring out the natural wood grain and provide UV protection.

Step 9: Cut Slots for Invisible Terrace Clips
Utilize either a biscuit jointer or a router (with a 4mm X 12,7mm slot cutting bit) to cut a slot in the edge of your plank above each sleeper joist. Center this groove on the edge of the plank so there is a symmetrical profile. This will provide the best results when using DeckWise® EXTREME® Terrace Clips. NOTE: Pre-grooved timber planks are readily available through many building and timber suppliers. If you are working with pre-grooved planks, overlook this step and move forward to Step 10.
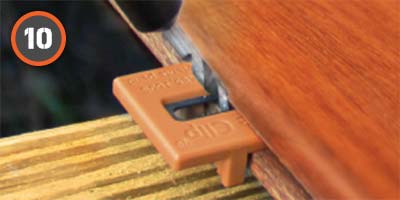
Step 10: Predrill a Pilot Hole (Hardwood Timber Material)
Place one terrace clip inside the edge slot or groove of the terrace plank above each joist for installation. Where two planks meet on a single joist, only one invisible clip is required. Drill a 3,2mm pilot hole at a 45° angle for every screw while installing terrace clips into the plank. You only need to pre-drill through the hardwood plank, not into the joist. Pre-drilling will help prevent plank splintering and will make certain the terrace plank is held tight to the joist by the screw.
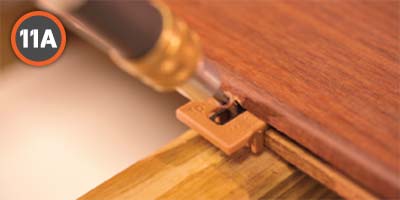
Step 11A: Installing Invisible Terrace Clips (Hardwood Timber Material)
Drive a stainless steel screw at roughly a 45° angle through the hole in the middle of the invisible terrace clip down through the pre-drilled terrace plank, and then into the sleeper joist below. Screwing should not take a significant amount of downward pressure to secure the plank. After the plank is secured to the joist, install the next fixing over each remaining joist. A screw gun with an adjustable clutch setting option works perfectly for this by adjusting the clutch to prevent over-driving screws. Finish securing the plank using one EXTREME® concealed clip and one screw per joist.
END-TO-END-BOARDS: How to Install “Butt Joints” (Hardwood & COMPOSITE Deck Material)
Where two boards meet on a single joist, the preferred method is to use a sister joist parallel to the main joist. Install 2 (two) DeckWise® Hidden Deck Fixings — one on each joist — where the boards meet. However, only one centered fastener can be installed at their meeting point.
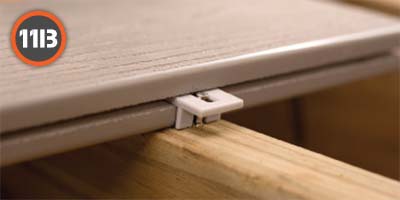
Step 11B: Installing Invisible Terrace Clips (Composite/PVC Terrace Materials)
Drive a stainless steel screw straight down a 90° angle through the center of the EXTREME® clip and down into the sleeper joist. It should not take a significant amount of pressure to secure the plank. After the plank is secured to the joist you may install the next fixing on the next joist. A screw-gun with an adjustable clutch setting option preferred for this to prevent overdriving terrace screws. Continue to secure the plank with one clip and one screw above each joist.
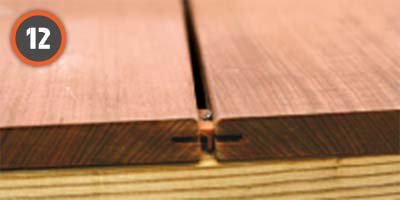
Step 12: Installing the Next Plank Over the Exposed Side of the Invisible Clip
Slide the next terrace plank over the installed invisible fixing clip. The clip will protrude outward from the previously secured plank. Once again, if you are not using pre-grooved planks, use a biscuit jointer or a router (with a 4mm X 12,7mm slot cutting bit) to cut a slot or groove in the plank directly above each joist. This slot will be slid over the clip and not secured with a screw. Remember, this next plank will again have terrace clips installed on its opposing edge.
NOTE: If using ExtremeKD® or Extreme S® invisible terrace fixings, utilize the DeckWise®plank Spacer Wedge tool included in each kit. Allow the wedge leg on the fixing, in combination with the spacer wedge tool, to dictate the gap spacing. This will ensure the incorporated fixing wedge legs are not mistakenly overly compressed during initial installation. Pull up and remove the Spacer Wedge tools after each terrace plank is secured. Repeat steps 10-12 until you reach the final plank.
Step 13: Final Terrace Plank Installation
On the final terrace timber plank, invisible fixings will not be installed. It is required to secure the outside edge of the last plank with stainless steel screws and timber plugs. Install screws every 61CM along the length of the outside sub framing. Screws can be concealed inside countersunk 9,5mm holes and filled hardwood plugs supplied in each kit. Additionally, we suggest applying a small amount of a quality adhesive on the outer timber sub-frame to assist with leveling and possible noise. (This adhesive will be under the last timber plank at the outer edge of the terrace.)
DO NOT OVER TIGHTEN SCREWS, they should be flush or slightly above the surface of the hardwood fixing clip. Screw's should be installed at an angle ranging from 45° to 65°. Always use an end grain wax sealer on end grain cuts to help stop checking and splits.
Electric Screw Gun, Drill Bits & Tips
Used for drilling pilot holes and installing terrace screws. (A cordless screwgun with an adjustable clutch is advisable so torque can be precisely set to prevent over-tightening of screws.) Use a 3,2mm drill bit and a 9,5mm countersink bit or the 3-in-1 Drill & Drive™ Drill Bit Set.
Bituminous strips/Tape
Used to prevent sleeper joist timber rot as well as sealing around timber screws.
Caulk Gun & Exterior Construction Adhesive
Utilized as a leveling agent for uneven joists.
Biscuit Jointer *
Typical cabinet maker tool, obtainable at most building & home improvement stores - Used to create a groove or slot in the edge of the terrace plank to enable insertion of invisible fixing clips.
Router *
May be utilized if access to biscuit joiner is not available. A 4mm biscuit cutting router bit (sometimes referred to as slot cutting bit) is acceptable. This method is favored by some installers.
* Not needed if using pre-grooved planks
Made in the USA!
All DeckWise® Terrace Building Products are proudly designed and factory-made in our US facility.
View Our Installation Video


The DeckWise® Drill & Drive™ tool speeds up the process of predrilling, plugging, and driving screws all with one tool.
learn more